Pages

Thursday, June 10, 2010

Sausage Kebabs with Parsley Cilantro Pesto

CSA Sausages + Veggies + Wooden Sticks = Sausage Kebabs.

Sausage Kebabs + Parsley Cilantro Pesto = Delicious and Easy.

Here's what you need to serve 3:

Kebabs:
3 Sausages (we had italian sausages from the CSA, but I imagine chicken sausages would be just as good)
1 bell pepper (or parts of three different colored peppers like I did)
1/4 red onion
wooden skewers, soaked in water for 15 minutes if you intend to use them anywhere near fire

Cube up your veggies and cut sausages into 1 inch pieces. Build your kebabs alternating sausage and veg.

Pesto:
1/3 cup parsley
1/3 cup cilantro
2 cloves garlic
1/4 cup (or so) extra virgin olive oil
zest of 1 lemon plus juice

In a food processor combine parsley, cilantro, garlic, lemon zest and lemon juice. Process until combine, then drizzle in the olive oil until it emulsifies.

I grilled the kebabs on my grill pan, 5 minutes a side. Then I brushed on the pesto and cooked an additional 5 minutes, flipped, brushed pesto on the other side and cooked until done. I served the remaining pesto on the side with a lovely salad.

Oh! Speaking of the salad - I halved and grilled a peach, sliced it up and threw it in the salad with a simple balsamic vinagrette. Yummy.

Wednesday, June 9, 2010

Oh Fiddleheads.

First, dear readers, I apologize for committing the cardinal sin of blogging, which of course, is not blogging. I've missed you. I've been busy, but I'm back now, not to worry.

Onward and upward to fiddleheads! Fiddlehead ferns are the unfurled heads of young ferns and can be found largely in the springtime. They have a bitter taste and can be used anywhere you would normally use a green leafy vegetable. I looked up a ton of recipes, but in the end, I just punted and made a simple appetizer: sauteed fiddleheads on toast. Delicious.

Every recipe I read recommended boiling the fiddleheads first, which I did. This takes some of the bitterness out of the vegetable...similar to what you might do with broccoli rabe. So, I washed the fiddleheads twice and then boiled them in salted water for about 5 minutes. I sauteed some garlic in olive oil and threw the fiddleheads in for a few minutes, just until they got a chance to get to know each other. I served them on buttered toast - sort of a very large veggie bruschetta. It was delicious! And look how cute they are!


Friday, June 4, 2010

sourdough starter


So I've been raising (it feels like childcare) a sourdough starter for the last couple of months (this reminds me to go right now and feed it). It started out a little rough, with several really dense flat loaves of bread only I would eat, but we're on a roll now, and I'm really excited about it. I've been making bread of all kinds - baguettes, big rustic loaves, focaccia, pizza... all without the need for any bought yeast whatsoever. I thought I'd collect a few bread events and tell you about all of them together, in the context of telling you how I made my sourdough starter.

I hesitate to even call it sour, because it doesn't actually impart much of a sour taste to the finished dough, though the starter itself smells sour, and it is purely wild yeast from the flour itself and what it picks up from the air, no store bought yeast. And yet it is raising all my yeast breads like gangbusters, I just can't believe it!

I started it back when we made those frites, remember those? We had to square the potatoes off to make nice stick shapes, so I saved the squared off scraps, and used them to begin my starter (it was the first use that came to mind when trying to figure out what they might be good for). Natural yeast exists in a lot of places - the white stuff on the outside of grapes, in potato skins, maybe on bananas too? and in the air around us (isn't it magical? or creepy). So making a sourdough starter basically means making a nice welcoming home for all that yeast to land in and make a home, and then feeding it, and caring for it, and then putting it to work raising bread for you.

I'll give you the recipe I used to begin with, but after a while, I changed my approach a little and the starter responded really well to it... so I'll suggest both methods, in combination. Anyway, here's how I began:

scraps from 6 small potatoes (basically just the peels, but some actual potato is good too)
water to cover, about 2 cups
1 cup flour (white for sure, bread flour is better than a.p. but not necessary)
1 1/2 tsp sugar
1/2 tsp salt
  1. Combine potatoes and water in a small stock pot or medium saucepan. Cover and boil for about 20 minutes. Drain cooking liquid into a large glass measuring cup. Ditch the potato scraps (compost, or salt em and eat em!)
  2. Transfer 1 1/4 cups of potato liquid to large ceramic or glass bowl. Add flour, sugar and salt to bowl; stir to combine. Cover bowl with cheesecloth or clean dishtowel and let stand at room temperature until starter begins to ferment and bubble, about 4 days.
At this point, I deviate from the recipe, so I've deleted their step three. The recipe claimed the starter was ready to use, but I found that it wasn't quite powerful enough on its own (though it made a glorious loaf of bread for Easter dinner, with the help of only 1/2 tsp of active dry yeast); it needed more loving care before it really came into its own.
In order to provide that care, I consulted the Joy of Cooking (one of many eternally useful gifts I've gotten from Jenean). They have a quick method of making a sourdough starter without the need for potato or lengthy fermentation. Basically, you feed it semi-constantly for a few days (it's like putting your starter on steroids!). Move 1 cup of the starter to a nice roomy container with a lid which you will keep at room temp on your countertop (with the leftover, you could either rinse it down the drain, which makes me sad, or you could use it to enhance the flavor of a regular bread recipe by adding it along with the liquid and a comparable increase in the flour called for in the recipe, and also probably a decrease by at least half, even 3/4, in the amount of yeast called for).

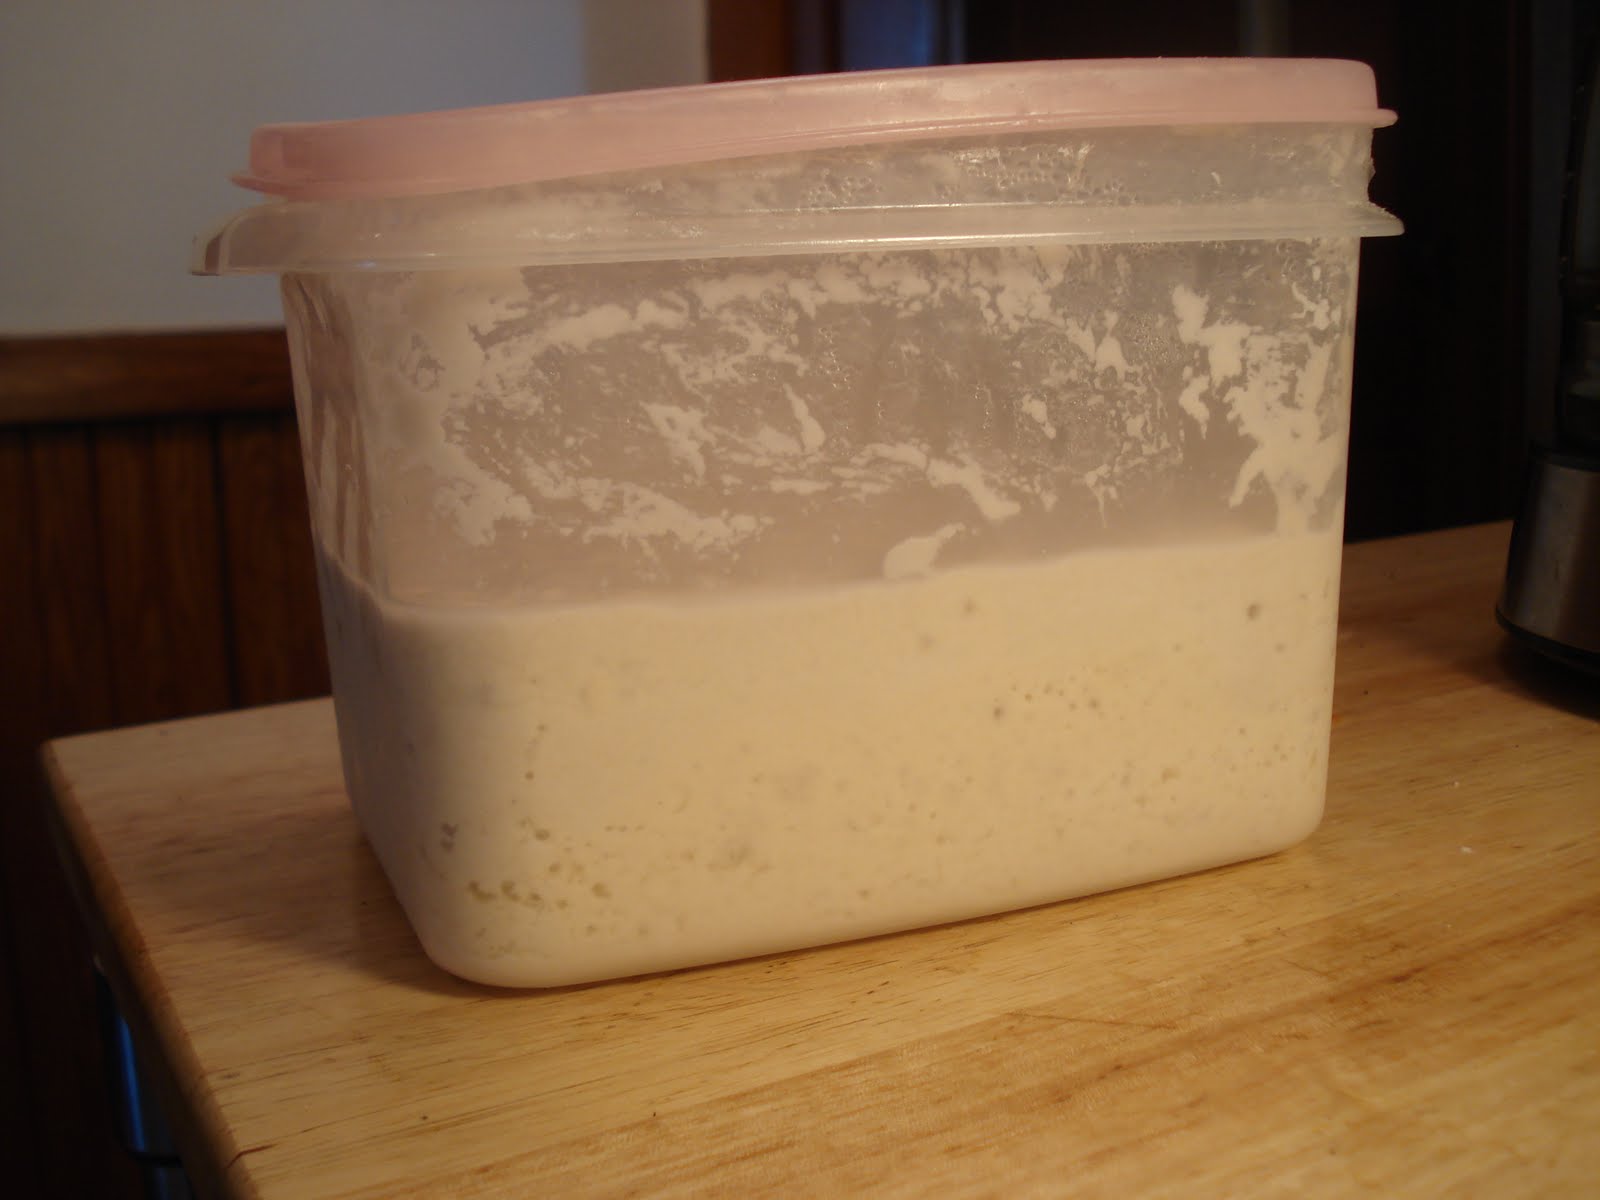
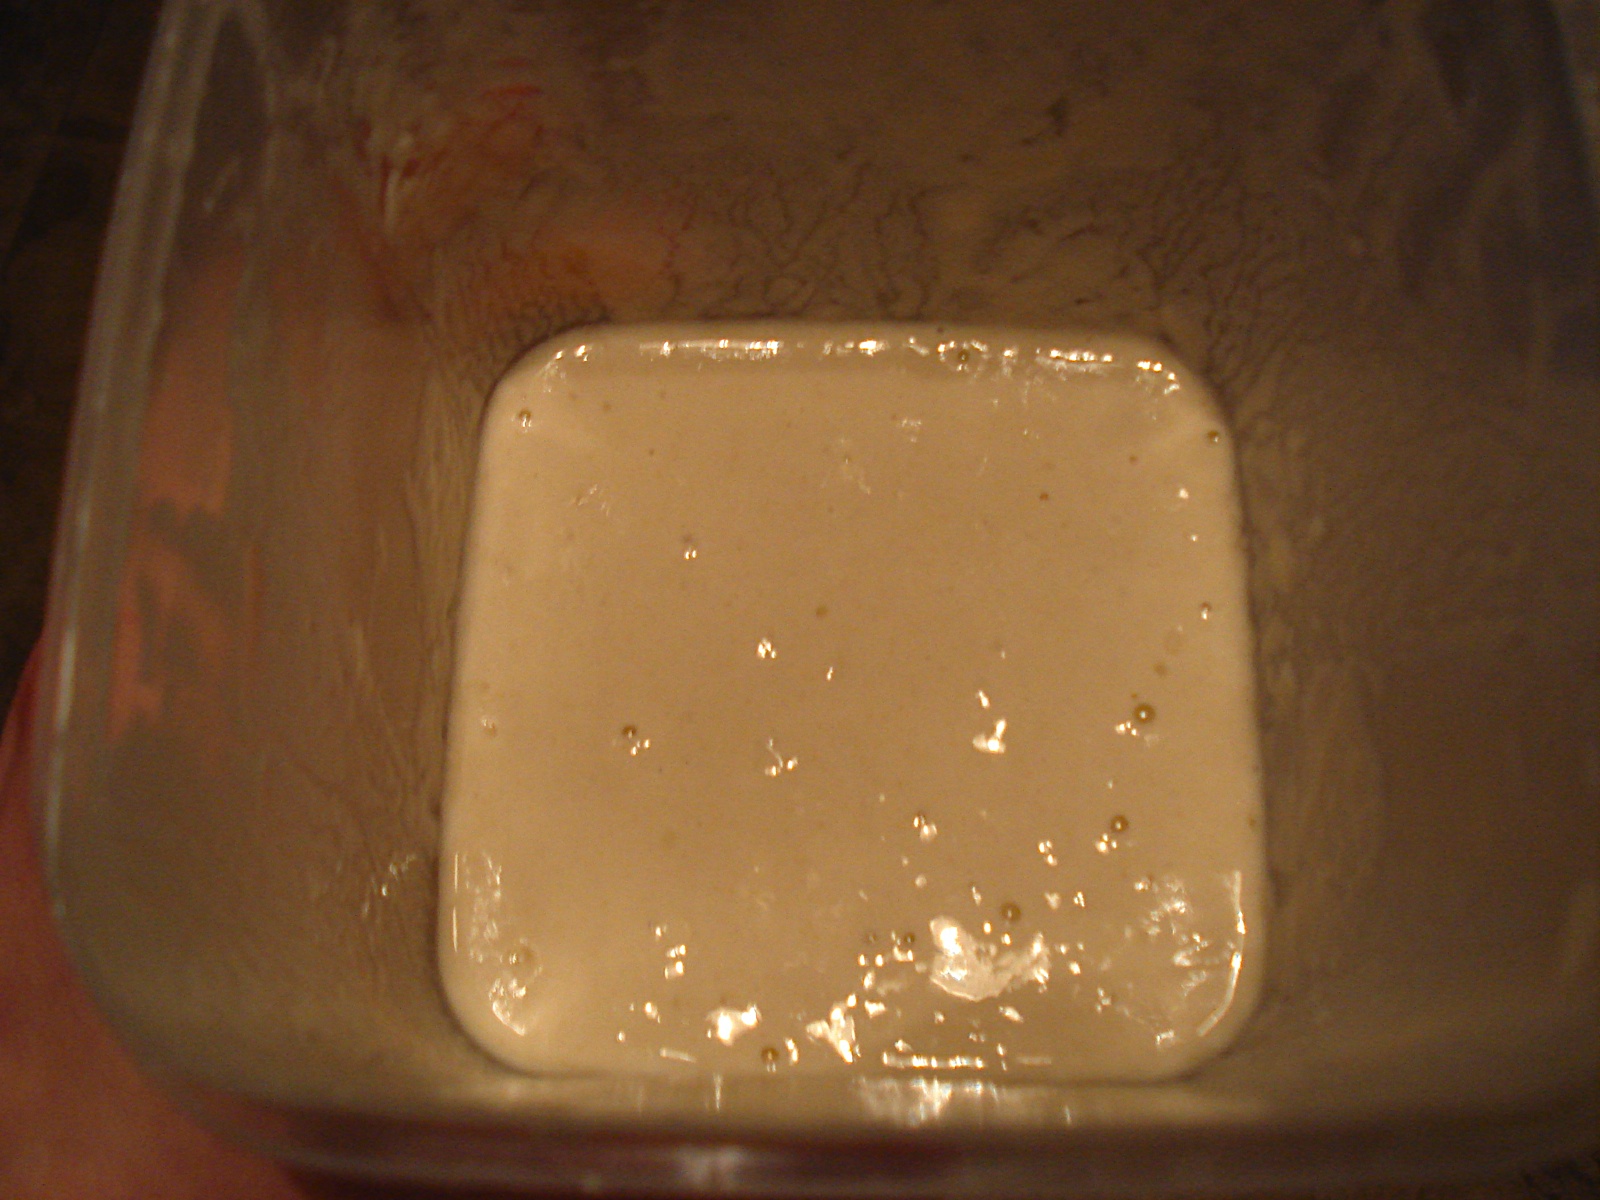
Meanwhile, the starter in its nice big container must now be fed on a twice a day basis (see, just like childcare) (kidding!); give it 1/4 cup flour and 1/8 cup room temperature water, stirring in the additions well with a wooden chopstick (easier to move around in there and clean up after than a wooden spoon, because the starter is so sticky... definitely use a wood utensil of some kind), twice a day for 3 days (6 feedings, or more if you wanted). It should start to look very bubbly, thick and yeasty. Also, it will turn into a lot of freaking starter! You might have to use some of it in other bread recipes (or if you have nerves of steel, discard some).

Once the starter is healthily bubbling, you can switch to keeping it in the refrigerator and feeding it once a week. Occasionally (once a month?) it is a good idea to super-size the feeding - use or discard all but 1 cup of the starter, and add to that cup 1 cup of flour and 1 cup of water, i.e. equal parts of each. Technically, if you had a food scale, you should do it by weight.


I now keep my starter in the fridge and feed it generously (1/2 cup flour, 1/3 cup water) once a week. That's the day I bake something with it - so the "discard" actually becomes the starter I use to bake, and the leftover goes on to propagate itself for next time.

Now for the baking part. When you are ready to bake, given that your starter is really active and bubbly and ready to go, you should be able to bake on that day. But this kind of dough responds well (flavor-wise) to slow rising, and so you could also park the dough in the fridge overnight and bake the next day.

In any case, the most important thing is that you have to feed the starter a final time, and then wait to let it... digest its meal. The zone to aim for to use the starter to actually make bread dough is 4 to 8 hours after feeding. I guess when it's full of new food, it can't muster the energy, but if you wait past 8 hours, its ability to raise your dough has waned.

So! You've fed it (using about 1 1/2 to 2 cups of your starter, trying to leave yourself about a cup in the big container, which also gets fed, to continue living in your fridge for next time) in a nice big mixing bowl, say 3/4 cup of flour and 1/2 cup water, and left it alone for at least 4 hours. It looks nice and bubbly now. So here's where I have to get even more vague.
It depends what kind of bread you're aiming to make to determine how much flour, water, oil, sugar, and salt you add. Sometimes there's no oil or sugar (like for a baguette or a big crusty round loaf), sometimes you need a tablespoon or two of each of those things (like for focaccia or pizza) to enrich the dough, sometimes you need a lot of flour, sometimes you want to keep it loose. You really have to do it by feel in any case, so I might just leave that kind of thing up to you. Basically what you have here is a very wet, dough-like entity, which will provide all the leavening you need and sometimes more. You will need to add salt - maybe a 1 to 1 1/2 teaspoons, depending on how much dough you're making. I'm definitely not claiming expertise here, and I think you all should experiment with it without trying to stick to any strict recipe - it's really fun to wing it with dough, and let your hands tell you, while kneading, how much flour you need.That's my only other advice - be sure to knead your dough a lot. That's how the gluten develops, which gives the dough the ability to hold itself up when the yeasties make it rise. I usually knead a dough for at least 10 minutes, 15 if I can. Roll up your sleeves, clear your counter, and have at it. Pick up the far end of the dough, fold it toward you, and then lean your weight onto it using the heel of your hand. turn it slighty and do it again. and etc.

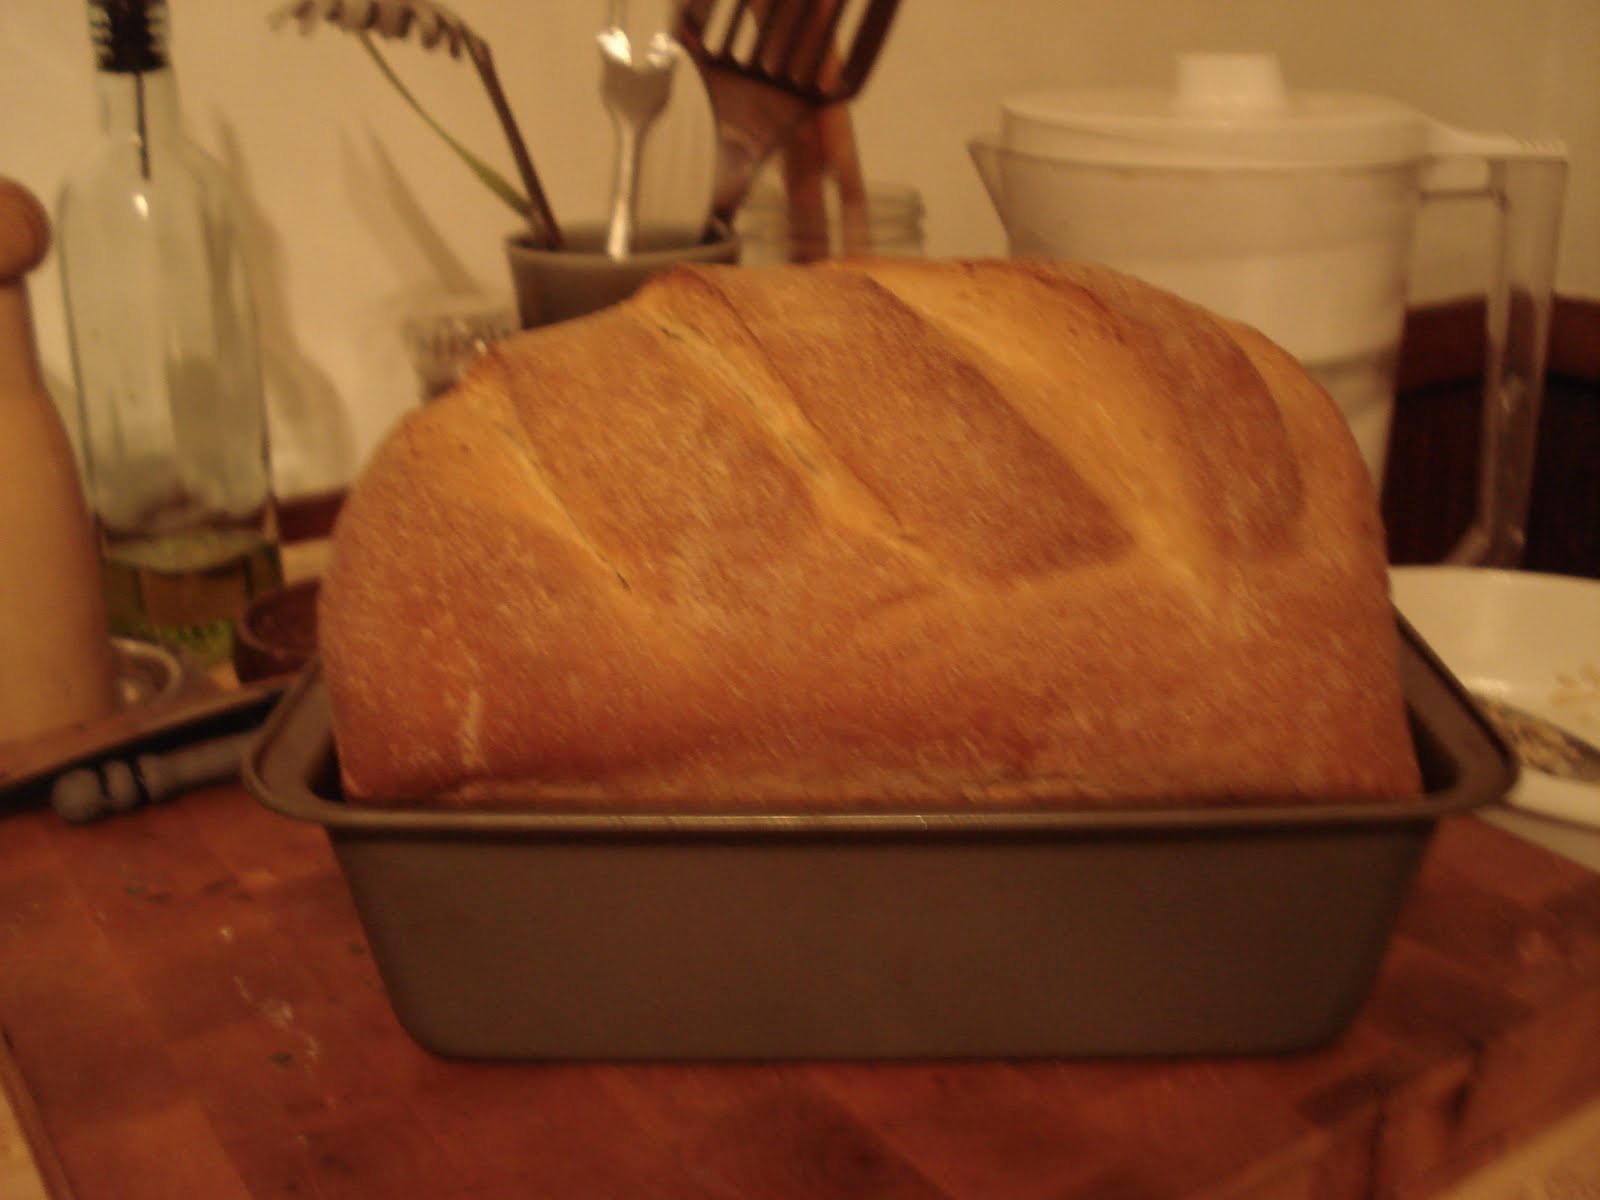
This one is probably my prettiest so far:

this one is my funniest. from this side it looks like a relatively normal big ole loaf of bread:
from this side, elephant man bread!
You can use the starter to make amazing focaccia (sorry, no pictures!), if you make the dough pretty wet, add a tbsp of sugar and 1/4 cup olive oil and let it rise till doubled. Then heavily oil a big baking sheet, mush it down in there, and sprinkle on fresh rosemary, salt, pepper and some more olive oil on top, bake at 450 till golden. Incidentally, most of the loaves I have pictures of here probably started in a 450 oven, then reduced to 350 after 15 minutes.

Thursday, May 20, 2010

Challenge update: pot pie with the world's best biscuit recipe

As some in our reading public may know, we have been really busy lately... and so many cooking/eating events have come and gone without making it onto the blob. We keep hope alive, and take photos, in case of having time, a little of which I have right now.

I wanted to let everyone know, the challenge has been going really well. Almost all of the weird, semi-abandoned containers of who-knows-what have been rescued from the freezer, and with a couple minor (best not to think about it) exceptions, eaten! I want to share one of these with you.

It was some kind of beef stew to begin with, made with onions and carrots, and maybe some red wine. I think I made it (unless our dad gave it to us) but I can't remember when, no idea actually. It was in the freezer in a quart container, but there wasn't enough there to make a good meal for three hungry people. I decided to turn it into a pot pie, since we always have flour for making biscuits, and all that biscuit topping makes for more food for everybody!

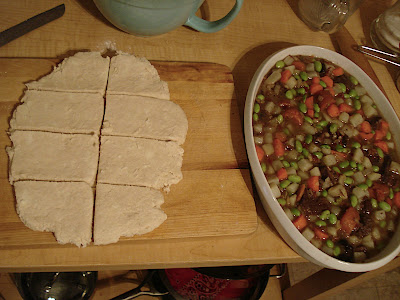
So I peeled and cubed up 3 potatoes and 3 carrots, and par boiled them with some edamame in salted water, until tender. I mixed them in with the stew (thus doubling the volume of stew!) and then made my biscuit dough. This is the only baked-good recipe I have memorized (I should be ashamed if I can't remember it, since it has nearly nothing in it) (I love recipes with nearly nothing in them, have you noticed?)

preheat oven to 450

ingredients:
2 cups flour
1 tsp salt
1 tbsp baking powder
1/3 cup vegetable shortening or butter
2/3 cup milk

In a big-ish bowl mix the flour, salt and baking powder. Add the shortening or butter, and using either a fork or a pastry blender, cut the fat into the flour until most of it is broken up, some pieces looking about the size of a pea, but a lot of it can be even smaller. It should look like crumb topping.
Make a well in the center of the flour mixture and pour in the milk. Use your fork to mix it around and get it evenly mixed in. Now here's the step it took me years of biscuit making to really get - even though they say you shouldn't over-work short dough like this, you also shouldn't under work it, did you know that?? So turn out your sort of shaggy looking dough onto a clean countertop and knead it - just maybe 5 times, just till it holds together. Then you roll it out, cut it into the shapes you want (I tend to cut it into squares these days because I hate re-rolling scraps), put them on a baking sheet and bake for about 12 minutes, until golden brown.
For the pot pie, I just laid it on top of the stew in a baking dish, and baked it all together for about 15 minutes. It was good.

Wednesday, May 12, 2010

easy pantry pasta

After that Lebanese cheap-as-heck-have-it-all-in-my-pantry Mjuddra recipe, I want to share with you another super-cheap-there-isn't-any-food-in-the-house-what-will-we-make-for-dinner staple of our childhood (and, in fact, adulthood), this time Italian, which our Mom always used to make (though our Dad is the Italian one; Mama's honorary Italian-Lebanese since she can cook all this stuff beautifully). She had a number of variations, and I feel like we always had it on fridays (being Catholics we always had fish, or at least no meat, on fridays). We called it Pasta with Anchovy Sauce, a name which sounds great to me, but which (I fear) will elicit a grimace/shudder from the general population. I can't deny it - my love for fish in cans (of practically all kinds) is very strong. Believe me, the anchovies melt right into the olive oil, you don't even know they're there! It just tastes great - rich, salty, garlicky, yummy. Plus, there are practically no ingredients.

The basic recipe is to heat about 1/3 cup of extra virgin olive oil in a large sauce pan (full disclosure:
I never measure, I just have a big wide frying pan that fits a pound of pasta, and I cover the bottom generously with oil), add anywhere from 3 to 5 thinly sliced garlic cloves, and a can of anchovies (with or without the oil they're packed in, I usually don't use it). Keep the heat on medium low at most, low if your garlic is getting brown, for a good 15 minutes at least, mashing at the anchovies with a wooden spoon, till they break down completely into a kind of brown paste. You want your garlic to get super soft and infuse into the oil, you don't want it brown and crisp up.

At this point, you could toss in your al dente pasta (any shape is great, boil it in generously salted water), grate on some black pepper, sprinkle with grated parmigiano, and eat it; you'd already have a total flavor sensation as well as a rich, satisfying (cheap!) meal on your hands. But many variations are possible. Some ideas for additions:

crushed red pepper
sliced onions
sliced bell peppers
sliced jalapenos (one of my mom's favorite additions I seem to remember)
any vegetable cut into bite sized pieces
sun dried tomato, sliced or chopped
halved grape tomatoes (add them off the heat with the pasta)
grated lemon zest
lemon juice
pitted olives
capers

This time our friend Reba was staying with us, in town so she could work (like a champ) on her thesis; on her way home she picked up a head of broccoli and a package of baby spinach (I had never thought of this idea, and man was it great!). So I cut up the broccoli pretty small, and threw that in with my penne for the last couple of minutes of boiling, and added the spinach right to the olive oil/garlic/anchovy mix in the big pan (to which I had added crushed red pepper and capers); the spinach wilted right down beautifully, and I drained and added the pasta and broccoli (saving a little of the pasta water in case of needing to loosen things up, which I did end up needing to do). I sprinkled on some grated cheese, and tossed it all around. Pretty good.

But my favorite part of this iteration of the dish was that I decided to make some garlicky toasted bread crumbs, for topping each serving (Mama never did this, I think I got this from Mario Batali or Lydia Bastianich). I took a big fat slice of some bread I had made the day before and removed the crust (this would probably equal 2 or 3 slices of store sliced bread). I tore the bread up into the food processor, and added 2 cloves of garlic, which I had chopped up a bit to help it disperse evenly among the bread crumbs. I let the food processor go until the bread crumbs were fairly small. I heated 2 tbsp butter and 1 tbsp olive oil in a frying pan, and added the breadcrumb/garlic mixture. You want to stir it around to get the fat to evenly coat all the crumbs, and then cook, stirring pretty regularly, until the crumbs turn a nice golden brown. Like toasting nuts, the crumbs will continue to get darker after you've turned off the heat, so stop a little before they look quite as brown as you want them.
A final word or two - of course you can leave out the anchovies if you want. But will you try them? Maybe just once? You might like them! Try using a half a can your first time. And also: yes, there are little bones in the anchovy filets. They're fine! You can chew them right up, it's no problem. You won't even know they're there, plus I'm sure they must contain a lot of nice calcium, so they're good for you.

Sunday, May 9, 2010

Mjuddrah

I know, that doesn't look like a real word. It's a phonetic approximation of an arabic word, the name of this wonderful (and wonderfully cheap) dish I'm going to tell you about. It's Lebanese style lentils and rice, and our dad (being half Lebanese) makes this all the time. There are very few ingredients, but if you do it right it's incredibly rich and delicious; paired with a salad that has lots of leafy greens, cucumber, dried mint, olive oil and lemon juice, it's pretty much a perfect plate of food. And did I mention cheap? This is a good recipe to make when you are home all day with some other task to accomplish (like practicing the piano for 7 hours), because most of it is hands off, and it only gets better as it sits. In fact, we ate leftovers from this batch for more than a week, and it was delicious the whole time (and a source of blessedly fast easy dinners and lunches over the course of many busy days for all of us).

Mjuddrah (Mmm-zhud-druh with a nice arabic rolled r) is made magically wonderful by the huge amounts of caramelized onions it contains (a universally recognized truth is that the smell of frying onions is one of the world's most wonderful smells). My dad usually fries up an extra little batch of onions for topping the lentils with afterwards (a practice I highly recommend). When I made it this time, I put such an enormous amount of onions into the mix to begin with that I felt more onions weren't needed. I must admit I missed the extra super brown onions on top (as a child they were absolutely my favorite part, in fact I think I wished I could be eating a whole plate of fried onions and skip the lentils and rice), so I'll do them from now on (you should too).

ingredients:
1 cup lentils
1 1/2 cups brown basmati rice (or whatever kind you have)
1/4 to 1/2 cup good olive oil
4 onions (if they had been large, maybe 3, mine were quite average)
5 cloves garlic
2 tsp toasted cumin seed
salt, black pepper, crushed red pepper
1 1/2 quarts stock or water or some combination thereof

Begin with your lentils and your rice. I used regular brown lentils, and brown basmati rice. I let them both soak in plenty of cold water while I worked on the onions.
I sliced up (pole to pole) 4 onions. Yes, 4. Believe me (more than 4 would not have hurt matters). I put at least 1/4 cup of olive oil in my big enameled cast iron pot, heated it up, and added the onions along with salt and pepper (the salt gets the onions to release their juices and break down a little quicker. I stayed with the onions (on high heat) while they got to softening up, and then turned it way down and let them go, coming back occasionally to stir, for maybe 20 minutes. Then I chopped up about 5 cloves of garlic, and ground up about 2 teaspoons toasted cumin seeds. When the onions were seriously deep golden brown, I added the garlic, the cumin, and a bit of crushed red pepper flakes.
Then I drained the rice from its soaking liquid and threw it in the pot with the onions. I turned up the heat and let the rice dry-toast in the oil for a little while.
Then I added about a quart and a half of liquid (I used part stock, part water - you could use all water, or all stock, up to you and what you happen to have in the house). Then I added some salt (maybe 2 tsp), stirred it up, brought it to a boil, and thinking that brown rice takes 45 minutes and lentils take 20, I let the brown rice simmer over low heat, covered, for about 15 minutes. Next time, I'd only do it for 5, because the rice cooked a lot quicker than expected and was almost perfectly done when I added the drained lentils. When those went in, I brought it back to the boil, covered it and put it in a 350 degree oven for 20 minutes. If you were to use white rice instead of brown, I would (from the stage of the onions being nice and golden) add the liquid to the onions first, bring it to the boil, add salt and then put the lentils in first, for five minutes, then add the rice, and after bringing back to the boil, cook covered, in the oven or on lowest heat on the stovetop, for another 17 minutes.
If you wanted (and I really think you should), you could save out a small pan-full (3/4 cup maybe) of the caramelized onions from the first step, which you could continue to fry till super golden and almost crispy, to put on top of each serving (or you could slice up another onion to fry up, if you don't think of it in time to save some out of the first batch). Don't forget that nice lemony minty salad, and maybe some warm pita bread. In FACT, putting all that (mjuddrah, salad, pita) together into a wrap or pocket sandwich is a GREAT idea. If you had some hummus nearby, that wouldn't hurt in there either. Maybe some shredded carrots too! Mmm.

Saturday, May 1, 2010

Coconut Delights with Marzipan and Cranberries

That name is a total goof, but I really have no idea what else to call them. We had 8 egg whites in the fridge that were leftover from some things we only need yolks for and Elaine instructed me to make Angel Food Cake. But I don't like Angel Food Cake and anyway the recipe called for 12 egg whites and what is the point of making something to use up your egg whites if you are just generating extra yolks? So then I thought I'd make meringues...but I had too many egg whites for a standard recipe and I don't really like meringues that much either so there was no point in making a double batch, let alone one batch. Then I settled on macaroons. But didn't really look up a recipe. So these did NOT turn out like macaroons at all. But they were delicious, so here is what I did.

I had:
1/2 a package of marzipan
1 15 oz package of sweetened coconut flakes
1 can (no idea how big) of Goya coconut creme
1/2 cup (or so) dried cranberries
8 egg whites
1 pinch salt
1/4 tsp cream of tartar
3/4 cup flour


I diced up the marzipan and mixed it with the coconut flakes, coconut creme and cranberries. Then I whipped up the egg whites in the kitchen aid mixer with a pinch of salt, a 1/4 tsp cream of tartar and 3/4 cup sugar until they formed stiff peaks, similar to when you're making meringues. My thought at this stage was that I would just mix the egg whites with the marzipan/coconut/coconut creme/cranberry mixture and make....cookies? This was a pretty silly idea as the batter was clearly going to be so liquidy from the coconut creme. The egg whites fell completely as soon as I mixed them into the rest of the ingredients and there was no chance of anything close to a cookie. We mixed in about 2/3 cup flour and it was still not able to hold any kind of shape. So, we went back to where it started and poured the batter into the Angel Food Cake pan and baked it at 350 degrees for probably 45 minutes.

It started to get really brown on the outside before the middle was done so we took it out and although we were able to slice it no problem and although it tasted GREAT, is was super gooey, too gooey on the inside. Sort of like coconut candy. Elaine had the brilliant idea of slicing the cake up and baking the slices again, similar to the method used for making biscotti. Good job, Elaine! She baked the slices at 425 degrees for another 30 minutes (she wants me to mention that she baked them on a silicone baking mat and she is not sure what would have happened if she didn't). They came out perfectly golden brown all over, crunchy on the outside and slightly chewy on the inside. These are really sweet, but the cranberries give a nice burst of much needed tartness. Overall, a success.