 So I've been raising (it feels like childcare) a sourdough starter for the last couple of months (this reminds me to go right now and feed it). It started out a little rough, with several really dense flat loaves of bread only I would eat, but we're on a roll now, and I'm really excited about it. I've been making bread of all kinds - baguettes, big rustic loaves, focaccia, pizza... all without the need for any bought yeast whatsoever. I thought I'd collect a few bread events and tell you about all of them together, in the context of telling you how I made my sourdough starter.
I hesitate to even call it sour, because it doesn't actually impart much of a sour taste to the finished dough, though the starter itself smells sour, and it is purely wild yeast from the flour itself and what it picks up from the air, no store bought yeast. And yet it is raising all my yeast breads like gangbusters, I just can't believe it!
I started it back when we made those frites, remember those? We had to square the potatoes off to make nice stick shapes, so I saved the squared off scraps, and used them to begin my starter (it was the first use that came to mind when trying to figure out what they might be good for). Natural yeast exists in a lot of places - the white stuff on the outside of grapes, in potato skins, maybe on bananas too? and in the air around us (isn't it magical? or creepy). So making a sourdough starter basically means making a nice welcoming home for all that yeast to land in and make a home, and then feeding it, and caring for it, and then putting it to work raising bread for you.
I'll give you the recipe I used to begin with, but after a while, I changed my approach a little and the starter responded really well to it... so I'll suggest both methods, in combination. Anyway, here's how I began:
scraps from 6 small potatoes (basically just the peels, but some actual potato is good too)
water to cover, about 2 cups
1 cup flour (white for sure, bread flour is better than a.p. but not necessary)
1 1/2 tsp sugar
1/2 tsp salt
- Combine potatoes and water in a small stock pot or medium saucepan. Cover and boil for about 20 minutes. Drain cooking liquid into a large glass measuring cup. Ditch the potato scraps (compost, or salt em and eat em!)
- Transfer 1 1/4 cups of potato liquid to large ceramic or glass bowl. Add flour, sugar and salt to bowl; stir to combine. Cover bowl with cheesecloth or clean dishtowel and let stand at room temperature until starter begins to ferment and bubble, about 4 days.
 In order to provide that care, I consulted the Joy of Cooking (one of many eternally useful gifts I've gotten from Jenean). They have a quick method of making a sourdough starter without the need for potato or lengthy fermentation. Basically, you feed it semi-constantly for a few days (it's like putting your starter on steroids!). Move 1 cup of the starter to a nice roomy container with a lid which you will keep at room temp on your countertop (with the leftover, you could either rinse it down the drain, which makes me sad, or you could use it to enhance the flavor of a regular bread recipe by adding it along with the liquid and a comparable increase in the flour called for in the recipe, and also probably a decrease by at least half, even 3/4, in the amount of yeast called for).
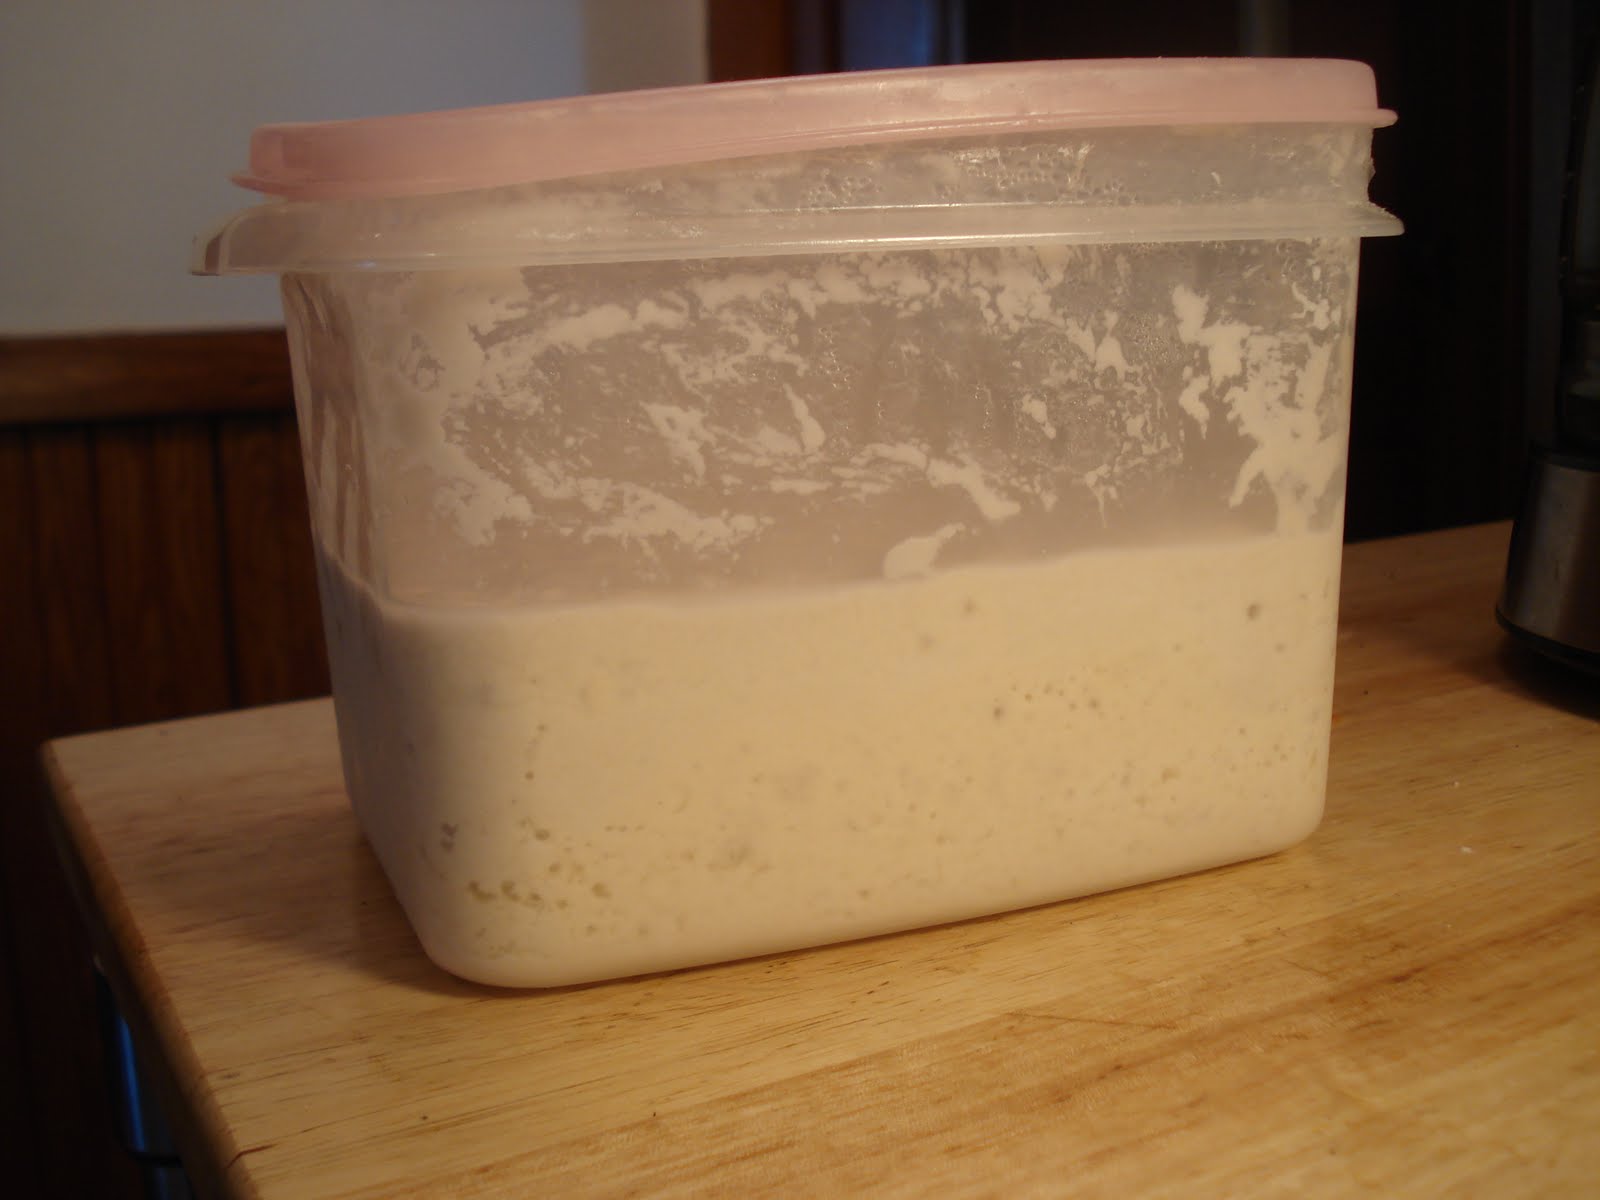
Meanwhile, the starter in its nice big container must now be fed on a twice a day basis (see, just like childcare) (kidding!); give it 1/4 cup flour and 1/8 cup room temperature water, stirring in the additions well with a wooden chopstick (easier to move around in there and clean up after than a wooden spoon, because the starter is so sticky... definitely use a wood utensil of some kind), twice a day for 3 days (6 feedings, or more if you wanted). It should start to look very bubbly, thick and yeasty. Also, it will turn into a lot of freaking starter! You might have to use some of it in other bread recipes (or if you have nerves of steel, discard some).
Once the starter is healthily bubbling, you can switch to keeping it in the refrigerator and feeding it once a week. Occasionally (once a month?) it is a good idea to super-size the feeding - use or discard all but 1 cup of the starter, and add to that cup 1 cup of flour and 1 cup of water, i.e. equal parts of each. Technically, if you had a food scale, you should do it by weight.

I now keep my starter in the fridge and feed it generously (1/2 cup flour, 1/3 cup water) once a week. That's the day I bake something with it - so the "discard" actually becomes the starter I use to bake, and the leftover goes on to propagate itself for next time.
Now for the baking part. When you are ready to bake, given that your starter is really active and bubbly and ready to go, you should be able to bake on that day. But this kind of dough responds well (flavor-wise) to slow rising, and so you could also park the dough in the fridge overnight and bake the next day.
In any case, the most important thing is that you have to feed the starter a final time, and then wait to let it... digest its meal. The zone to aim for to use the starter to actually make bread dough is 4 to 8 hours after feeding. I guess when it's full of new food, it can't muster the energy, but if you wait past 8 hours, its ability to raise your dough has waned.
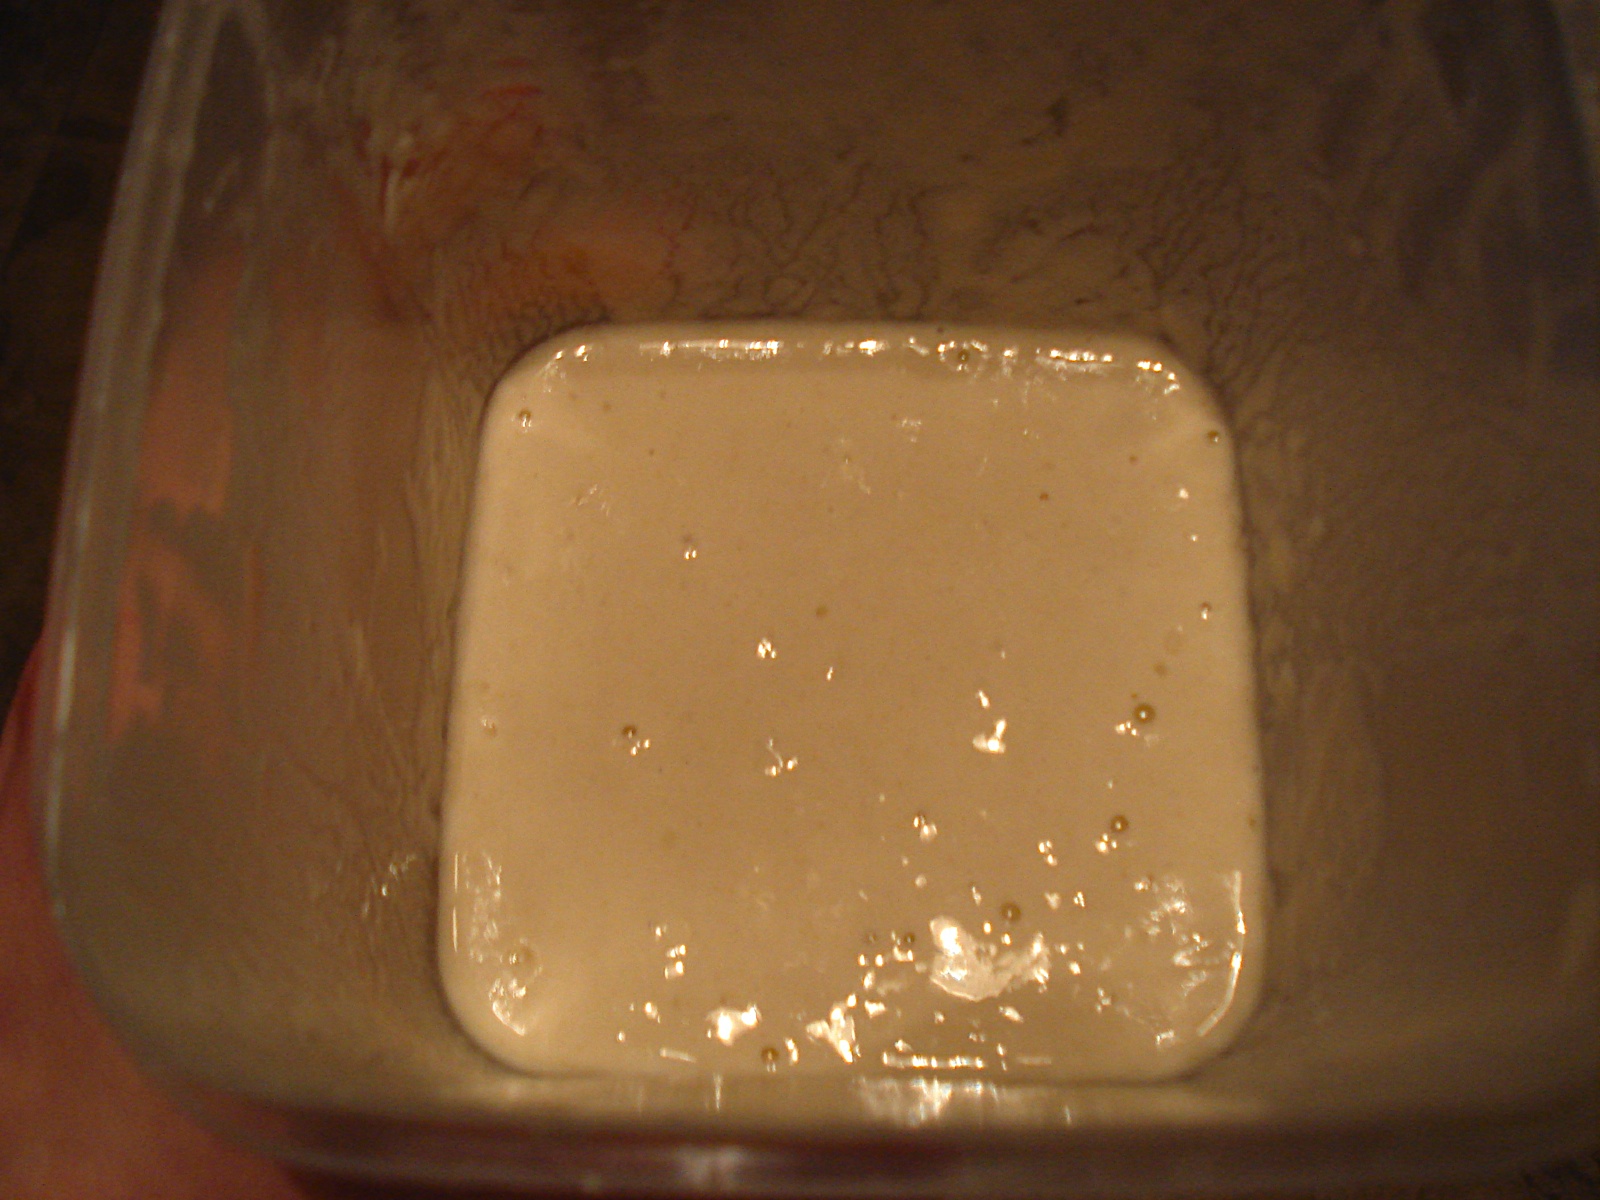
So! You've fed it (using about 1 1/2 to 2 cups of your starter, trying to leave yourself about a cup in the big container, which also gets fed, to continue living in your fridge for next time) in a nice big mixing bowl, say 3/4 cup of flour and 1/2 cup water, and left it alone for at least 4 hours. It looks nice and bubbly now. So here's where I have to get even more vague.
 It depends what kind of bread you're aiming to make to determine how much flour, water, oil, sugar, and salt you add. Sometimes there's no oil or sugar (like for a baguette or a big crusty round loaf), sometimes you need a tablespoon or two of each of those things (like for focaccia or pizza) to enrich the dough, sometimes you need a lot of flour, sometimes you want to keep it loose. You really have to do it by feel in any case, so I might just leave that kind of thing up to you. Basically what you have here is a very wet, dough-like entity, which will provide all the leavening you need and sometimes more. You will need to add salt - maybe a 1 to 1 1/2 teaspoons, depending on how much dough you're making. I'm definitely not claiming expertise here, and I think you all should experiment with it without trying to stick to any strict recipe - it's really fun to wing it with dough, and let your hands tell you, while kneading, how much flour you need.
 That's my only other advice - be sure to knead your dough a lot. That's how the gluten develops, which gives the dough the ability to hold itself up when the yeasties make it rise. I usually knead a dough for at least 10 minutes, 15 if I can. Roll up your sleeves, clear your counter, and have at it. Pick up the far end of the dough, fold it toward you, and then lean your weight onto it using the heel of your hand. turn it slighty and do it again. and etc.
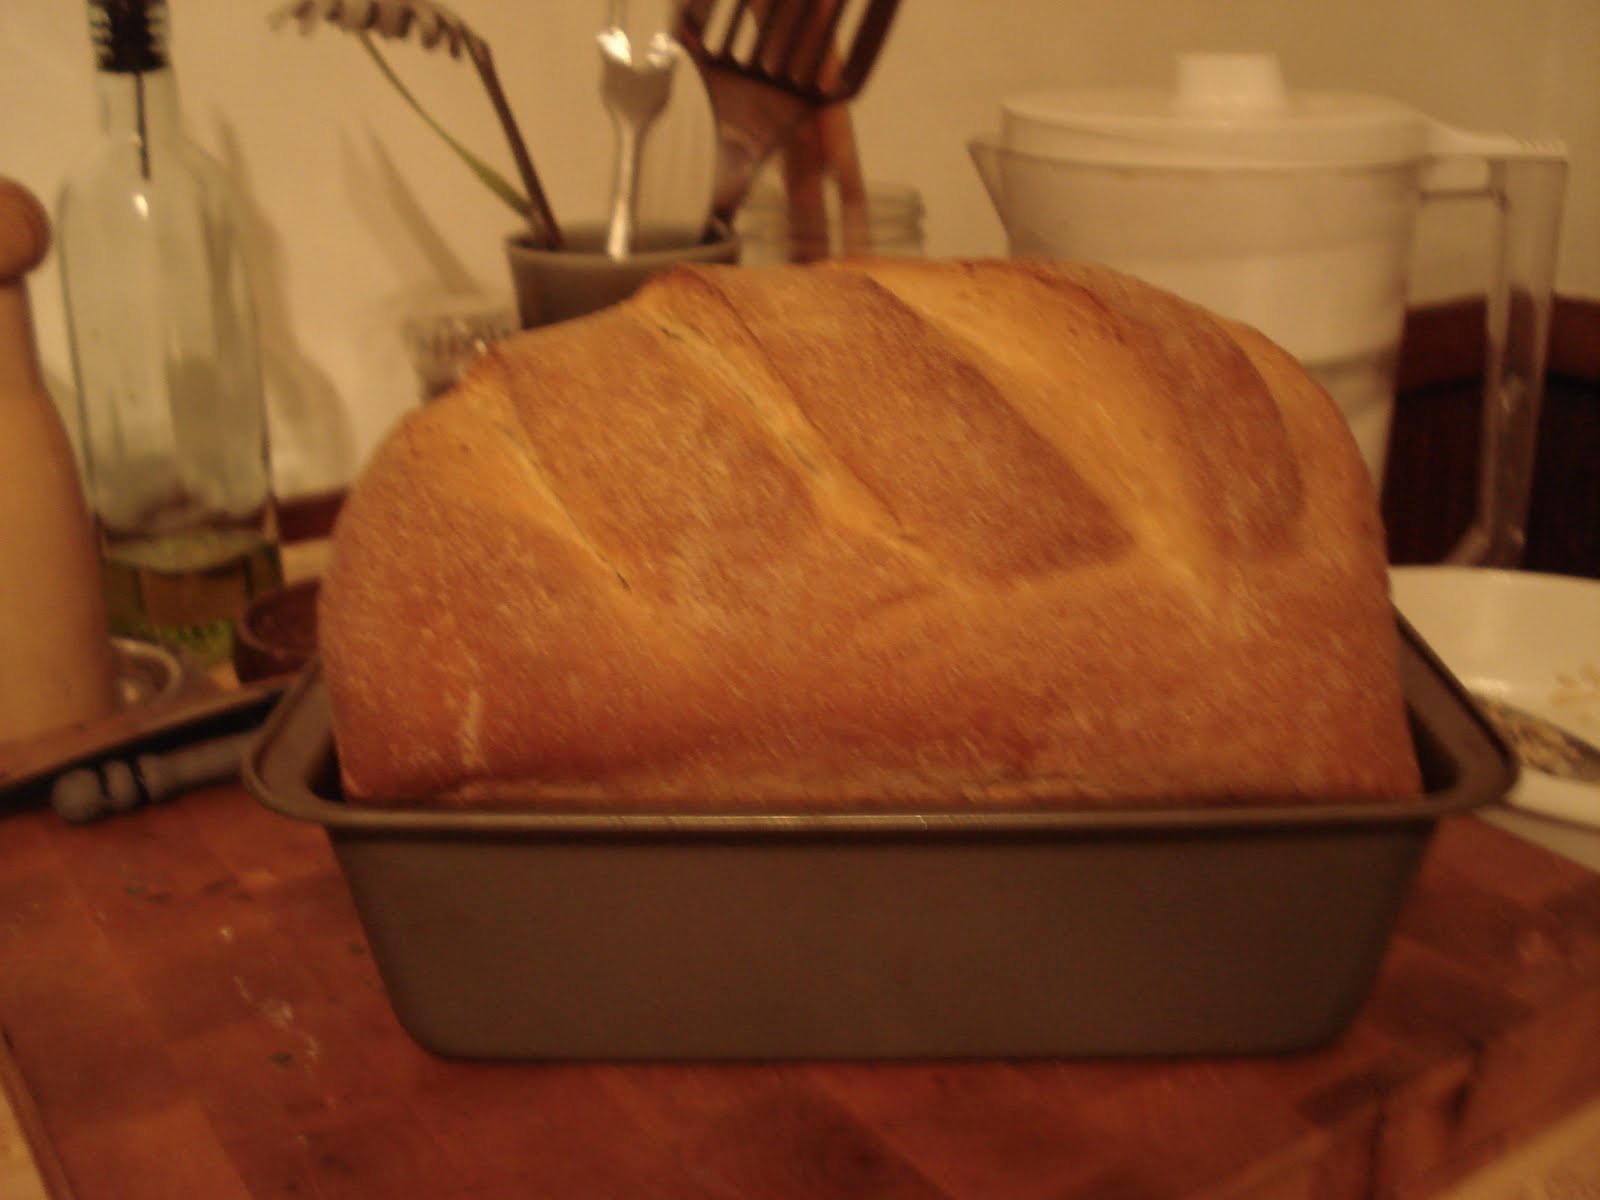
This one is probably my prettiest so far:


this one is my funniest. from this side it looks like a relatively normal big ole loaf of bread:
 from this side, elephant man bread!
 You can use the starter to make amazing focaccia (sorry, no pictures!), if you make the dough pretty wet, add a tbsp of sugar and 1/4 cup olive oil and let it rise till doubled. Then heavily oil a big baking sheet, mush it down in there, and sprinkle on fresh rosemary, salt, pepper and some more olive oil on top, bake at 450 till golden. Incidentally, most of the loaves I have pictures of here probably started in a 450 oven, then reduced to 350 after 15 minutes.
No comments:
Post a Comment